Ex Data, Scientia
Home
Contact
E-Learning with swirl and swirlify
E-Learning has been an important cornerstone in teaching programs on programming languages and staistics, not just since the Covid pandemic. Here, we are going to look at how to design e-learning lessons with the swirlify package in R.
The programming language R is often considered to bear a steep learning curve for novices to the field of text-based programs. Since learning speed can vary considerably between students, and since the time provided in supervised courses is insufficient for some students to understand and practice all lecture contents, electronic self-learning courses were developed to provide the possibility for content repetition in individual iniative.
Several R packages have been developed to facilitate the design of such e-learning courses. Swilify is one of them; it allows designing miniature programs that can be accessed by the student using the related package swirl. What sets this package apart from most others is that it provides the student with an interactive, reponsive environment. A students' solution to a task is not merely declared as "correct" or "wrong". Rather, accompanying texts explaining the background of the correct solution are provided by the lecture designer. Similarly, the designer can provide hints, motivating messages or links to websites with further background on the lesson subject. This creates, to some extent, the illusion of supervision, potentially creating a relatively comfortable learning atmosphere.
In order to develop our own lessons with swirly, we first need to install and call the package.
install.packages('swirlify')
library('swirlify')
We can then start right away designing our first lesson by calling swirlify("lesson", "course"). This command shows the structuring of e-learning units in swirl: Subjects are grouped into courses, which themselves contain several lessons. The fracturing of teaching content into courses and lessons is entirely up to the designer; courses could, for example, be regression and classification, while the regression course might contains the lessons Linear Regression and Non-linear Regression. The call of the mentioned command creates a folder structure in the current R working directory corresponding to the course-lesson scheme. In case we want to add a new lesson to an existing course, we can call the same command, altering the lesson name. This will add a corresponding directory in the existing course folder.
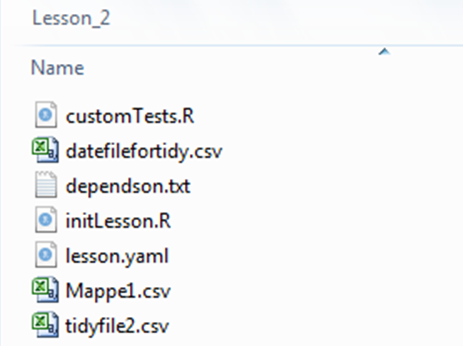
Within each lesson folder are a number of files that we will edit to write our lecture. The central part is a .yaml file named lesson.yaml. In this script, we will write down our exercises for the students, mostly in the form of questions requiring a very specific answer, or in the form of multiple-choice questions. While this is not a traditional R or RMarkdown script, in can be easily opened with and edited using the RStudio IDE. However, testing the exercises for functionality is not as straightforward as simply executing them in the console - this instead requires specific swirl commands, which will be explained later. The second important script is named initLesson.R. Here, we will need to define any dependencies, e.g. objects or functions, load any required datasets or packages, and make changes to the swirl default settings, if desired. In essence, this script will execute all the preparatory work needed for the exercises in the .yaml script to properly function. The final two scripts, customTests.R and dependson.txt, do not need to be edited, in my experience. Note that none of these script names should be changed, since internal swirl scripts will look for exactly these script names when compiling the lessons and courses for use. Now let's have a more detailed look at the lesson.yaml and initLesson.R scripts:

The lesson.yaml file is very much unlike normal programming scripts you would write in R or other programming languages. It has a very fixed structure, with blocks of code that all share the same basic structure. Basically, each block of code is defined by a Class argument, and the type of class chosen defines a number of slots that can be filled with content. Each block is started with a leading dash ("-"), the remainder of the block is then indented. What follows is a list of slots. Each slot name is followed by a colon, and then by the value or content associated with that slot. The number and sequence of blocks is unconstrained for the most part. There are several types of classes: The class meta is used at the beginning of the script, and provides the name of the course and the session, the author names and affiliations, license information and more. It is not displayed to the swirl user, but can be of interest to teachers looking for contact information regarding the lesson designers. Since the yaml scripts can be accessed after installing a course, teachers can easily find the meta information. The text class is intended to simply print messages to the screen. Its only slot is the Output slot, which should contain the text to be printed as a character string (i.e., delimited by quotation marks).
- Class: meta
  Course: Introduction to Analytical Statistics
  Lesson: Linear Regression
  Author: John Doe
  Type: Standard
  Organization: Institute for Statistics
  License: GNU GPLv3.
  Version: 2.4.3

- Class: text
  Output: 'Welcome to lesson one! Here, you will learn a lot about linear regression!'
The cmd_question class is certainly the most commonly used class. It is used to generate questions that require user input in the form of e.g. a key word, a calculation or a different kind of R command. The first slot of this class is again the Output slot, which contains the question or task posed to the user. The next slot, CorrectAnswer, should contain a command that returns the output expected to be returned by the user input. Note that it is only important that the returned output matches, the command used to achieve the output can vary from the expected user command (this is useful when you allow for multiple correct user commands). The next slot, AnswerTests, contains the expected user input as a character string. This slots checks the command used by the user to arrive at a solution. So, when the expected output is 20, then the user might either write 4 * 5, which would be the desired command, or he / she might write 20. The latter is of course not the desired user behaviour, which is noted by the program using the AnswerTests slot. The question will then be marked as wrongly answered. AnswerTests can accept either a function called omnitest in case there is only one correct solution, or a function called any_of_exprs when there are multiple correct solutions. omnitest requires a single character string specifying the correct solution passed to the correctEpr argument. any_of_exprs requires character strings of all the solutions accepted, in this example 4 * 5 and 5 * 4. Note that swirlify is sensitive the usage of spaces, so the answer style should be explained at the beginning of the lesson using blocks of class text. The final slot is the Hint slot, which is used to display a message in case the user gives a wrong answer. As in the Output slot, one single character string should be supplied. This string can contain a true hint that hopefully makes it easier for the user to answer the question, or simply the correct solution. The latter version can be used in case it is difficult for the user to review lecture materials, or when providing a hint is difficult to implement. It is, at the point of this writing, not possible to provide a sequence of hints. Note that users are able to skip any question requiring user input. User input that might be required as real R commands to form the basis of a later question (e.g. a dataset-formatting operation) will then be executed according to the command provided in the CorrectAnswer slot. The CorrectAnswer slots of all code blocks should thus, in conjunction with the commands in the initLesson.R script, enable a flawless start-to-end execution of the pure R components of the lesson.
- Class: cmd_question
  Output: 'Please calculate the third root of 27!'
  CorrectAnswer: 3
  AnswerTests: any_of_exprs('27^(1/3)', '27**(1/3)')
  Hint: 'Note that you should do this calculation by hand!'
The mult_question class provides the means to design a single-choice question. This class again contains Output as its first slot; here, the question to be printed is provided as a character string. The next slot, AnswerChoices, is used to provide the answers that can be selected by the user, i.e. correct and wrong answers. Each optional answer is given as though it were an R object, i.e. without quotation marks. Answers are separated by a semikolon plus space. The next slot, CorrectAnswer, contains the single correct answer from those given in the previous slot. Again, it / they are provided without quotation marks. In the additional AnswerTest slot, the correct solution is again provided to the correctExpr function of the omnitest function. A Hint slot is also provided to display messages in case the user makes a wrong choice. Personally, I have never tried to desing a true multiple-choice question using mult_question. The official website, http://swirlstats.com/swirlify/writing.html, only shows a single-choice question as an example, so it is unclear whether multiple correct answers can actually be provided, and what synthax of the AnswerTests slot would be required. In any way, multiple-choice questions could be approximated by providing answer options like x and y, y and z, x and z. Single-choice questions will also be printed to the console, with the sequence of answers varying at random. The user must then type the index of the correct answer to the console (note that this can become a bit confusing when your answer choices are also one-digit numbers).
- Class: mult_question
  Output: 'What is the capital of France?'
  AnswerChoices: Paris; Lyon; Brussels
  CorrectAnswer: Paris
  AnswerTests: omnitest(correctVal = 'Paris')
  Hint: 'One of the options shown is not city in France!'
The video class provides the means for linking to websites. This class contains the Output slot, which contains, as usual, the message asking whether the user would like to visit the website. The VideoLink slot then contains the URL of the website as a character string. In the context of the lesson, the user will be asked by an internal swirl function if he / she would like to visit the website or continue with the lesson. Blocks of this class are typically provided towards the end of a lesson to link to other class materials.
- Class: video
  Output: 'Would you like to visit the ExDataScientia website now?'
  VideoLink: 'https://www.exdatascientia.com'
The figure class allows displaying a plot of any type in the plots panel of RStudio, as a means of supporting text information as given in text-class blocks (blocks demanding the user to create plots are still of cmd_question class). As in all other classes, the first slot is the "Output" slot, where some text related to the plot shown should be written. The Figure slot demands the name of a .R script located in the lesson directory. This R script must be written by the lesson designer; typically, it simply contains a print() command in combination with e.g. a plot() or ggplot() command. Since the script is executed after the initLesson.R script has been executed (details see below), the plot R script can make use of all the variables stored in the environment. Thus, the objects referred to in the plotting command do not need to be created in the plotting script, and it can remain very much "bare-bones". See below for a typical plotting script. The fianl slot in the figure class is the FigureType slot, which can be set to new (without quotation marks), which indicates that plot elements should not be added to an existing plot already opened in the plot panel.
print(
  ggplot() +
    geom_histogram(my_object$y)
)
- Class: figure
  Output: 'Have a look at the distribution of the data!'
  Figure: My_Plot.R
  FigureType: new
Now let us take a look at the initLesson.R file. As stated above, this file is executed before the lesson commences with the first question or message to the user. It thus sets up the R session without the user having to do so in the context of lesson tasks. Typical contents of the initLesson.R script are the optional installation and import of packages, the import and preparation of datasets and the definition of custom functions to be accessed during lesson tasks. Datasets to be imported are typically supplied as part of the zipped course file that is downloaded by the user (unless it is part of the base R package). They are located in the lesson folder that contains the lesson.yaml and initLesson.R scripts; however, the user's working directory may not be set to that folder upon starting a lesson. Therefore, a function is defined in initLesson that determines the path from where datasets are to be imported:
.get_course_path <- function(){
  tryCatch(swirl:::swirl_courses_dir(),
           error = function(c) {file.path(find.package("swirl"),"Courses")}
  )
}
The details of this function are not of particular interest here. It is used to yield the full path name that contains the particular course and lesson at hand. A typical initlesson.R script may thus look like this:
.get_course_path <- function(){
  tryCatch(swirl:::swirl_courses_dir(),
           error = function(c) {file.path(find.package("swirl"),"Courses")}
  )
}

if(!'dplyr' %in% installed.packages()){
  install.packages("tidyverse")
}

library(tidyverse)

lesson_data <- read.csv(file.path(.get_course_path(), "My_Course", "My_Lesson_01", "lesson_data.csv"),sep=";")

fifth_root <- (x){
  return(x**(1/5))
}
Note that the user should be advised in advance of starting the course that packages may be installed auomatically - if the user is somewhat experienced in R already, he / she may have installed specific versions of packages for a specific need. Installation of a new package can cause the automatic installation of dependencies, which may, in unfortunate, though seldom cases, contain a package version different from that already installed by the user.
The initLesson.R file can also be used to customize the swirl session configurations to some extent: The lesson language used in the user-script dialogue can be specified (this, of course, does not apply to the questions and tasks written by the lesson author, but only to general messages displayed by swirl, for example the initial greetings when loading the swirl package with the library command). This is achieved by using the simple select_language function. Also, automatic "comments" by swirl that are displayed during the lesson (e.g. short motivation messages) can be turned off by using the swirl_options function and setting swirl_is_fun to FALSE:
select_language(language = "english")
swirl_options(swirl_is_fun = F)
Given that the cmd_question blocks in the .yaml script basically just exist as an interface to the R session, it is also possible to create functions with more advanced user-interaction in the initLesson.R script. Of particular interest might be the usage of the readline function, which, in conjunction with the assign function, can quickly map user input to variables in the environment without the requirement of a command question in which the user should perform the mapping him- or herself. This is particularly useful when a series of variables should be created by the user, and when the focus of the task is more on the calculation, or on implementing a work-flow, rather than on assigning variables to objects. A function combining readline with assign could look like this:
Go <- function(){
  ans_1 <- readline("Mean of iris sepal widths: ");
  if(eval(parse(text = as.character(ans_1))) == mean(iris$Sepal.Width)){
    assign(x = "mean_sepwidth", value = eval(parse(text = as.character(ans_1))), envir = .GlobalEnv)
  }
  else{
    assign(x = "mean_sepwidth", value = mean(iris$Sepal.Width), envir = .GlobalEnv)
  };

  ans_2 <- readline("Standard deviation of iris sepal widths: ");
  if(eval(parse(text = as.character(ans_2))) == sd(iris$Sepal.Width)){
    assign(x = "sd_sepwidth", value = eval(parse(text = as.character(ans_2))), envir = .GlobalEnv)
  }
  else{
    assign(x = "sd_sepwidth", value = sd(iris$Sepal.Width), envir = .GlobalEnv)
  }
}
Note that in the first part of this function, a readline object named "ans_1" is created. Calling readline invokes a user-program dialogue in the console, in which the user is asked to perform a calculation, in this case calculating the mean of the Sepal.Width variable in the iris dataset. The user can write the calculation in the usual form, he / she does not have to provide a character string containing the calculation. The ans_1 object is then transformed into a character string (before transformation, it exists in an ambiguous state). This character (which contains the command written by the user) string is then evaluated using the nested parse() and eval() commands to execute the user input. The result is compared to the desired result. If the result of the evaluation matches the desired result, then it is assigned to the global environment using the assign function, which takes as argument x the name of the object in the environment, as argument value the object (or value) assigned to that name, and as argument envir the name of the environment to assign that variable to. In our case, it is simply always assigned to the .GlobalEnv environment, which is the main accessible environment in the R session (note that it is possible to create several nested environments with uniue names in R, but that is not of interest here). In case the evaluation of user input does not match the expectation, then the correct calculation is assigned instead, in order to be able to progress with the function. The same sequence of demanding user input, comparing its evaluation to expectation, and assigning a variable to the global environment, is then repeated for the calculation of the standard deviation.
The user will call the Go() function in the context of the lesson by giving the answer Go() to a cmd_question-class block in the .yaml script. This then takes the user momentarily out of the swirl dialogue and into the readline dialogue (input demands in the Go() function are posed sequentially, with each new input demand appearing after the previous one has been addressed by the user). The readline context releases the user back to the swirl context once all input demands have been answered by input that could be properly evaluated (i.e. that provided a meaningful expression to R), independent of whether the inputs were correct or not. Otherwise, if the user provided non-sensical input, the rest of the Go() function fails, and the user is also taken back to swirl. The cmd_question asking to enter Go() then yields its hint message, allowing the user to try their luck one more by again calling Go(), or to skip the question. In my experience, for unknown reasons, the Go() function is executed twice after the user has executed "Go()" in the console. While slightly annoying, it does allow the user to correct input in case he / she notices a mistake by him- / herself.
- Class: cmd_question
  Output: 'Please write Go() into the console in order to create a sequence of variables in the environment. This will temporarily invoke a new user-program dialogue, but do not fear!'
  CorrectAnswer: Go()
  AnswerTests: omnitest(correctVal = 'Go()')
  Hint: 'You probably made an input that R does not understand. Try your luck once more by typing Go() again!'
When a lesson is finished, it can be tested for correct functionality by calling test_lesson(). Any errors to the swirl synthax will be pointed out in the console, such that they can be corrected. The lesson can also be demoed by calling demo_lesson, which allows to play the lesson from the user's point-of-view. Passing indices to the arguments from and to enable the demoing of parts of the lesson only. This is quite a convenient functionality to de-bug the code in the .yaml and initLesson.R scripts. A typical de-bugging workflow may consist of iteratively calling test_lesson(), making changes to the script(s), and running demo_lesson() to check if the changes had the desired effect.
When a lesson works properly, it should be added to the so-called MANIFEST file. This is actually just a simple text file, which determines in which order the lessons should appear in its parent course. This file will be automatically accessed by swirl when the course is executed in the user context. A lesson can be added by calling add_to_manifest (without any input arguments), at least when a lesson file is currently opened. If it is not, e.g. because all lessons are written and you are about to compile the course, it is a good idea to first call set_lesson(), which will open a file-browser window to let you choose (and open) the .yaml file of the respective lesson to be added to the MANIFEST. Adding lessons to the MANIFEST in sequence could therefore consist of repeatedly calling set_lesson() and add_to_manifest(). In practice, it is also possible to edit the MANIFEST file manually, though, by simply opening it with a text editor. If your lectures have complex names, you may risk writing mistakes, though. You can also add a file named LICENSE.txt, in which you can write down information about the rights to the content you created. Like the MANIFEST file, it should be located in the course folder, i.e. the same folder that also contains the lesson subdirectories.
Finally, when all lessons have successfully been checked for functionality, and have been added to the MANIFEST, you can compile the course into a compressed file, i.e. a .swc file. This is achieved by setting any lesson in the course you want to compile (using set_lesson()), and then using the pack_course() command. This will create a compressed form of your course directory and all its contents, which has the same name as the name of your course directory, and is located in the parent directory of the course directory. This file can easily be shared e.g. via e-mail, and is ready to be installed by any user using the standard swirl commands. Note that after installation, all the files that make up the course, i.e. the full lesson subdirectories, are located in the swirl directory of the R library directory on your computer (i.e. the place where all other packages are installed), more specifically in C:/Users/user/Documents/R/win-library/3.5/swirl/Courses (Windows) or home/user/R/x86_64-pc-linux-gnu-library/3.5/swirl/Courses (Linux) ("3.5" determines the R version, and may therefore vary). These files can be copied and / or edited, enabling collaboration between lesson designers.
This information should be able to help you write your own swirl e-learning courses. There is, of course, also official documentation of the swirlify package, at http://swirlstats.com/swirlify/index.html, though as a newbie to the package, that site still left me with many questions. It is my hope that the previous text can help others who have trouble operating the swirlify package.